

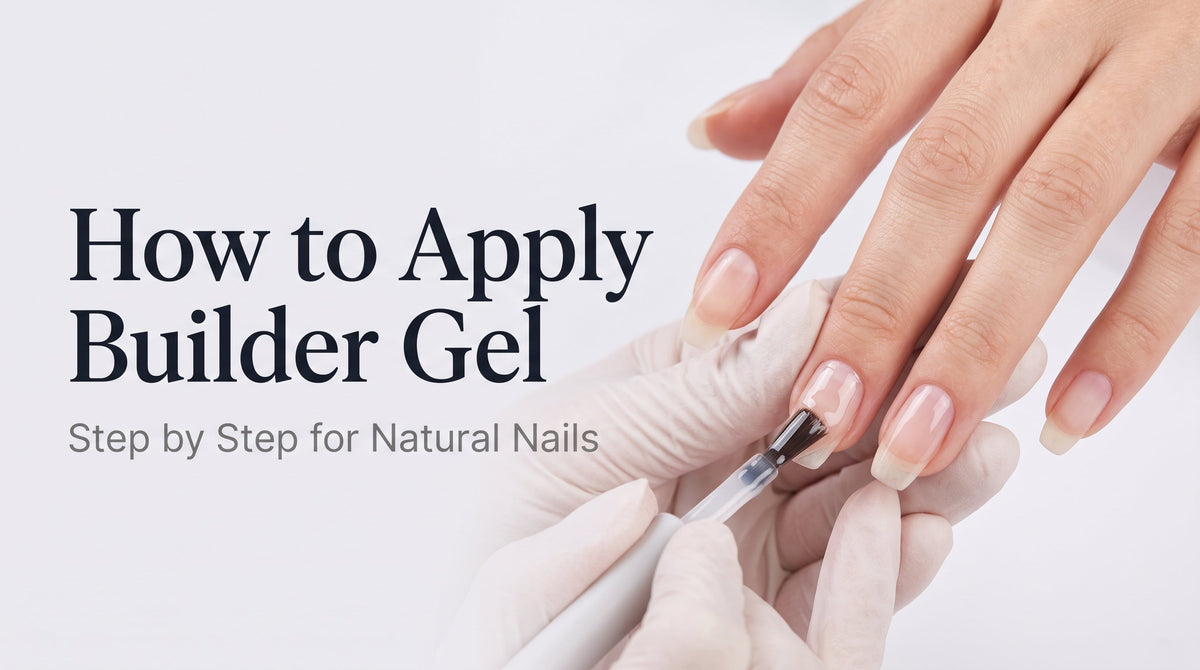
Builder gel is self-leveling. That single fact rewrites almost every stroke of the application, because your brush is there to guide the gel, not to spread it. Once you internalize that, the eight steps below become mechanical, the crooked apex stops happening, and the 15 to 30 minutes per set you used to spend correcting mistakes go away.
Fast facts
- Builder gel flows to the lowest point on its own. Your brush guides it, it does not spread it.
- Pick up roughly a mung bean of gel for short nails, a corn kernel for long. That is it.
- Skip the thin uncured slip layer and you lose the self-level advantage on every nail.
- A crooked apex gets fixed by adding gel and re-curing, not by filing after cure.
- The same jar of gel behaves differently in summer and winter because temperature changes viscosity.
The One Rule That Changes Everything: Gel Is Self-Leveling
Almost every mistake in a new tech's first month with builder gel comes from one wrong instinct: treating the gel the same way she would treat acrylic. Acrylic needs to be pressed, patted, and shaped by the hand. Gel does not. Gel wants to flow to the lowest point on the nail plate, and if you keep pushing it around while it is trying to settle, you actively interfere with the surface it was going to give you for free.
Nail-extension documentation names three systems, and it names them by the hand logic each one requires, not by the chemistry. That distinction matters, because a tech who learns the hand logic in isolation from the marketing terms can switch product families later without relearning her technique from scratch. If you are still deciding which system a job calls for, What Is Builder Gel? covers the five jobs builder gel does and the two it cannot.
| System | Hand logic | What your hand actually does |
|---|---|---|
| Acrylic | Bead logic | Powder-to-liquid ratio sets the working time. You place one bead per zone and shape it by pressing before the bead sets. |
| Builder gel | Float and Guide | The gel wants to flow to the lowest point. Place a bead in the apex zone and let it settle before you refine anything. Your brush guides direction, it does not distribute product. |
| Poly gel | Press and Smooth | Does not self-level. It stays wherever you leave it. Needs a slip solution and a firm press to move at all. |
There is one universal rule that stays true across all three systems, and it is worth writing on the wall of every training salon: pick up less product than you think you need. Adding more is always easier than filing away the excess after the fact.

How Much Product to Pick Up
The single most common quote in the technician pain-library about builder gel is "too little and it comes up short, too much and it floods". The consequence recorded in the same library is 15 to 30 minutes per set wasted correcting the miscalculation. Almost every tutorial teaches the eight application steps and completely skips the question of how much gel to load onto the brush in the first place, which is why this problem never goes away.
There are three ways to measure a correct amount without relying on feel. Any of them works, and all three work with any builder gel because they measure the gel itself, not a bottle-specific number.
Method one: a visible everyday size
| Nail length | Amount of gel |
|---|---|
| Short natural nail | About the size of a mung bean |
| Long natural nail | About the size of a corn kernel |
Method two: by surface area
For any nail, the correct load is roughly half the surface area of the plate when you look down at it from above. Load that much and see. If it turns out to be short, add. Do not preemptively add extra to your first pickup.
Method three: read the placed bead before it moves
Set the bead down and look at it. If the gel already touches the two side walls before you have done anything with your brush, you loaded too much. Wipe the brush, come back with less.
Do not react by swinging to the opposite extreme, though. A layer that is too thin lifts just as reliably as one that is too thick, because there is not enough material at the free edge to survive a light bump. The correct rule is thin per layer, sufficient total thickness built across multiple thin layers.
The Eight Steps, In Order
This is the sequence from the moment the nail plate is prepped and clean to the moment the final cure ends. If the plate is not prepped yet, start with The 10-Step Nail Prep Checklist first. Two of these steps are the ones techs skip most often and they are the two cheapest ones on the list. Both together take under ten seconds and replace an entire filing-and-correction stage later.
| Step | What you do | What goes wrong most often |
|---|---|---|
| 1 | Thin base layer. Bond or base coat over the prepped plate. Cure. | Skipped entirely, and the builder mass placed straight onto the natural nail. |
| 2 | Thin uncured slip layer. Sweep one very thin layer of builder across the whole nail. Leave it wet. Do not cure. | Skipped, which forfeits the self-level advantage on every following step. |
| 3 | Place a bead of gel in the apex zone, roughly the middle of the nail, leaving about a 1 mm gap from the cuticle skin. | Bead placed too close to the cuticle. |
| 4 | Push the bead gently toward the base with the brush tip, one millimeter at a time, until the gap to the skin is about 1 mm. | Sweeping directly into the sidewall in one stroke, which pushes gel onto skin. |
| 5 | Draw the brush from base to free edge in one light, low-angle pass. Do not press. Do not go back and forth. | Pressing the brush, going back and forth, or holding the brush upright. |
| 6 | Stop touching. Wait a few seconds and let the gel self-level. | Going straight to the lamp before the surface settles. |
| 7 | Refine the shape with the brush tip while the gel is still wet. | Deciding to correct shape after the cure with a file. |
| 8 | Cure. Follow the timing your gel manufacturer publishes for the lamp you actually own. | Guessing the time from feel or from a number heard in another salon. |

After step 8, the sequence continues into color coat, top coat, wiping the tacky inhibition layer on the final layer (see Why Is My Builder Gel Sticky After Curing?), and finishing with cuticle oil. Those steps are shared with regular gel applications and do not belong in the builder gel step list.
Do Not Skip the Slip Layer
The thin uncured slip layer at step 2 is the smallest step in the sequence and the one that changes the most about the outcome. It appears in the technique video corpus and it appears in internal salon procedure documents under the name "uncured frame layer". Two independent sources arriving at the same technique from different angles is one of the strongest signals in this whole guide.
The mechanism is simple. A dense bead of builder gel placed onto a dry nail surface grips wherever it lands, and you have to physically move it with the brush to make it flow. The same bead placed onto a thin wet layer of the same gel has a channel to slide along. It self-distributes with almost no intervention from you.
How to Hold the Brush
Four things about the brush, and three of them are things not to do. This is the single densest cluster of bad habits carried over from acrylic training, and rewiring them is the fastest technique improvement most new techs will make.
| Do or do not | What it means and why |
|---|---|
| Do keep the brush almost flat, close to horizontal. | The belly of the bristles distributes gel across the surface. A vertical brush cuts the surface with the tip like a knife and leaves a gouge that the gel then has to fill again. |
| Do not press down. | Pressing pushes gel out of the zone where you wanted it and traps air into the layer where it did not exist before. Both effects show up later as either a lifted sidewall or a bubble under the top coat. |
| Do not go back and forth. | Every pass across a stroke you already made disturbs the surface that was flattening on its own. A single, decisive pass gives the flattest surface you will ever get. |
| Do not drag hard along one line. | That lateral force pushes the whole mass of gel in the direction of the stroke, which is exactly how gel ends up flooded on one sidewall and thin on the other. |
In place of pressing, learn a light tapping motion with the tip of the brush that barely touches the top of the bead. The tap breaks surface tension enough to move gel into position without transferring lateral force into the layer beneath.

When a nail is long or the plate is wide, split the bead
For a wider surface or a longer nail, a slightly different approach makes life easier for a beginner: instead of one central bead, place two or three smaller beads along the midline and gently connect them. Each small bead has less distance to spread, so it settles faster and more evenly, and thickness is easier to control at the placement stage rather than the correction stage.
The 1 mm Margin: Getting Close Without Flooding
The professional-looking finish at the base of the nail lives inside a very narrow band. A gel that stops too far from the cuticle looks like a stair-step and reads as amateur work at a glance. Gel that touches the cuticle skin causes a lifting problem within a few days. The correct target is a gap of roughly one millimeter, and there is a specific brush motion that hits it consistently.
Place the bead a small distance away from the cuticle line rather than directly against it, then push it toward the skin one millimeter at a time using the tip of the brush. Stop when the gel edge is about a millimeter away from the skin. The bead moves in the direction the brush pushes it, so a slow controlled push lets you find the stop point before the gel flows past it. A single sweep straight into the sidewall pushes the whole mass all at once and always overshoots.
| Failure mode at the cuticle line | What it causes |
|---|---|
| Gel flooding onto the skin | Skin at the base of the nail moves constantly during hand use. That movement stresses the seal, and lifting starts at the base of the nail. If you already cured before catching it, the correction is filing right against skin, which is where beginner accidents happen. |
| Gel stopping too far from the cuticle | A visible stair-step at the base, which no top coat can hide, and which reads as an untrained finish from a normal viewing distance. |
Crooked Apex? Add More Gel. Do Not File.

This is the strongest habit-break in the whole guide, because it goes directly against instinct. The reflex when a cured set has a crooked apex is to reach for the file and shape the gel back into place. The internal salon documentation is explicit: minimize post-cure filing on builder gel, because filing thins the apex, and the apex is the structural component of the whole build.
The apex is the highest point of the built arch on a side profile. It sits somewhere between one-third and two-thirds of the way from the cuticle to the free edge, and it acts like the keystone of an arch, spreading force along the length of the nail instead of concentrating it at any single spot. Filing to correct the shape reduces the exact material that was carrying that load. The nail set looks more symmetrical afterward, and it breaks sooner in real hand use. The physics of why the apex carries the set is covered in Apex and C-Curve: The Physics Behind Nails That Last.
The correct fix: add gel where it is missing, then cure again
Place a small additional bead at the spot where the apex should have peaked, let it self-level into the existing profile, refine while still wet, then cure. You added material where it was missing instead of removing material where it was already correct. The final profile is where you wanted it and the structural mass is intact.
Where the apex belongs, by nail length
- Short natural nail: Apex sits slightly past the middle of the nail.
- Medium natural nail: Apex sits at or just past the stress zone of the nail (the part that flexes during heavy hand use).
- Long natural nail: Apex needs to be more pronounced and better supported by mass underneath, because there is more length past the apex flexing during hand use.
The corresponding mass distribution across the whole build reads as thin at the cuticle, thicker along the body of the nail, thickest at the apex zone, and tapered thin again toward the free edge. The single most common distribution mistake is thick product at the cuticle line, and it fails on two fronts at once: it makes the finish look fake from a normal viewing angle, and it sits at the part of the nail that moves most during hand use, so it pops off first.
Why Your Technique Changes in Summer
This is one of the least-discussed factors in builder gel application, and every working technician has run into it. A quote that appears repeatedly in the pain library: "summer gel runs thin, hard to control the shape." It is not an imagined difference. Ambient temperature changes the viscosity of the gel in the bottle, and viscosity controls how fast the gel flows once you place it on the nail.
| Ambient condition | What happens to gel behavior | How to adapt |
|---|---|---|
| Warm room | Gel is thinner. It self-levels very fast and drifts toward the sidewall quickly. | Shape the apex sooner and cure a bit earlier than you would in winter. If you wait as long as you did in cooler weather, the gel has already run past the point you wanted. |
| Cool room | Gel is thicker. It takes longer to self-level after placement. | Wait a beat longer before curing. If you rush the lamp when the surface has not settled yet, you lock in an unfinished shape. |
What Builder Gel Cannot Do
Every guide about a technique should include the section on where the technique stops working. Builder gel is designed for overlay work and for short extensions in the range of about 2 to 3 mm past the natural free edge. It is not a long-extension system. When a client wants dramatic length, builder gel is the wrong tool, and the answer is not to build the gel thicker. Building thicker attempts three failure modes at once: excessive heat during the cure, the bottom of the layer not curing at all, and structural fracture at the extended tip within days.
For dramatic length, the appropriate systems are hard gel, acrylic, or a tip-based extension approach, each of which trades off differently. Builder, Hard, Soft, Polygel, Rubber Base: Five Gels Compared lays out those trade-offs side by side. Builder gel is not a one-size-fits-all replacement for those systems, and pushing it past its designed range is where most of the "my nails snapped in three days" pain quotes originate.
Common Application Mistakes
This table is the failure-mode collection built from the technician pain library. The quote in the first column is verbatim from working techs. The middle column names what was actually happening. The right column is the fix.
| What the tech says | What is actually happening | The fix |
|---|---|---|
| "Too little and it comes up short, too much floods" | Loading gel by feel, and feel changes finger to finger. | Use a visible reference size (mung bean short, corn kernel long) or half the visible plate area. |
| "Crooked apex, I keep filing and it will not round out" | Filing to correct shape after cure. Removing exactly the structural mass that was carrying load. | Add gel where the apex should have peaked, self-level, refine wet, cure again. |
| "Too little goes thin, too much floods" | No slip layer, so the bead has no channel to flow along and it has to be dragged by the brush. | Sweep a thin uncured slip layer first, then place the shaping bead onto the wet surface. |
| "I pressed the middle first and now the sides are full of bubbles" | Wrong pressure sequence. Pressing the middle first traps air on both sides and no exit path. | Start pressure at the cuticle side and sweep outward toward the free edge. Do not force any single press. |
| "If I go thick it burns, if I go thin it snaps" | Reading "thin" as thin overall rather than thin per layer. | Thin per layer, then build multiple layers to reach the total thickness you need. |
| "Summer gel is runny and hard to control" | Keeping the same pause and cure rhythm as in winter after viscosity dropped. | In warm weather, shape sooner and cure a bit earlier. In cool weather, wait a beat longer before curing. |
Removing Builder Gel
Removal is a separate technique with its own filing depth, soaking time, and safety considerations, and covering it in depth inside an application guide would confuse both intents. If you are here because your builder gel needs to come off rather than because you are about to apply a new set, the removal walkthrough is "Builder Gel Removal and Soak-Off" (in production for this series), which covers the file-to-two-thirds-depth step, soak timing, and the mistakes that damage the natural nail.
Learn More
Live now on SNS Nail Education
- What Is Builder Gel? A Nail Tech's Guide to Builder Gel
- The 10-Step Nail Prep Checklist That Stops 80% of Lifting
- Apex and C-Curve: The Physics Behind Nails That Last
- Builder, Hard, Soft, Polygel, Rubber Base: Five Gels Compared
- Why Is My Builder Gel Sticky After Curing? It's Normal
How this article was developed
The eight-step sequence, the slip-layer technique, and the add-do-not-file apex rule documented here draw on SNS technical documentation and internal salon procedure used in the SNS training program, cross-checked against a technique video corpus and a library of verbatim technician pain points. Where the article states a mechanism, it argues from principle rather than from a proprietary test result.
Numbers deliberately omitted: cure seconds, flash-cure seconds, lamp wattages, and wear-time days are not published in this article because they vary too much across gels and lamps to fix as a rule. Follow the manufacturer sheet on the gel and lamp you actually use.
Brand names deliberately omitted: every stroke is described in generic technique language so it works on any builder gel line.
Frequently Asked Questions
What is the one principle that explains why builder gel is not applied like regular gel polish?
Builder gel is self-leveling. It flows toward the lowest point of the nail on its own, so the brush is there to guide direction and not to spread product. That single fact changes almost every stroke of the application. Acrylic works on bead logic (pressing and shaping a bead by hand), builder gel works on Float and Guide logic (placing a bead and letting it settle), and poly gel works on Press and Smooth (staying wherever it is left, needing a slip solution to move).
How much builder gel should I load onto the brush, and why do the same measurements work across brands?
There are three ways to measure without relying on feel. First, a visible reference size: a mung-bean-sized bead for short nails, a corn-kernel-sized bead for long. Second, a surface-area target: roughly half the visible area of the nail plate. Third, read the placed bead: if it touches both sidewalls before you have used the brush, it is already too much. All three work with any brand because they measure the gel itself, not a brand-specific number.
In what two ways does too much gel cause the set to fail, and why does too little also fail?
Excess gel fails in two directions at once. It floods toward the sidewall skin, and skin contact breaks the base-of-nail seal so lifting starts there first. And it forms a layer thick enough that cure light cannot reach the bottom of the layer, so the underside stays soft no matter how long the lamp runs. Too little gel fails differently: the free edge does not have enough material to survive a light bump, so chipping and edge lift start early.
What does the thin uncured slip layer do, and why is it a lifting-prevention step rather than a cosmetic step?
The slip layer is a very thin coat of builder gel swept across the whole nail and left wet, not cured, before the shaping bead goes on. It gives the bead a channel to slide along instead of forcing you to drag it with the brush. Less brush intervention means a flatter mid-nail surface, fewer trapped air pockets, and less gel pushed sideways toward the sidewall. Sidewall gel on skin is where base-of-nail lifting begins, so a step that keeps gel away from skin is a lifting-prevention step.
What are the four things to remember about holding the brush, and why does going back and forth ruin the surface?
Hold the brush almost flat so the belly of the bristles distributes gel instead of the tip cutting the surface. Do not press down, because pressing displaces gel and traps air. Do not go back and forth, because every extra pass disturbs the surface that was flattening on its own. Do not drag hard along one line, because lateral force pushes the whole mass toward one sidewall. Going back and forth ruins the surface specifically because self-leveling only happens when the surface is left alone.
If the apex is crooked after the cure, what should I do, what must I not do, and why?
Add a small bead of gel where the apex should have peaked, let it self-level into the existing profile, refine while wet, and cure again. Do not file the cured surface to correct the shape. The apex is the structural component of the whole build, and filing removes exactly the material that was carrying the load. The set looks more even for a day and breaks in real hand use sooner.
How does the same bottle of builder gel behave differently in summer and winter, and how do I adjust?
Ambient temperature changes the viscosity of the gel. Warm rooms make the gel thinner and it self-levels faster and drifts toward the sidewall sooner, so shape the apex sooner and cure a bit earlier than you would in cooler weather. Cool rooms make the gel thicker so it takes longer to settle, so wait a beat longer before curing. Using the winter rhythm in July is why a good tech can suddenly seem to lose her touch in summer.
A client asks for an 8 mm extension in builder gel. What do you tell her, and what do you suggest instead?
Builder gel is designed for overlay work and short extensions up to about 2 to 3 mm past the natural free edge, not for dramatic length. Building the gel thicker to reach 8 mm attempts three failure modes at once: excessive cure heat, an uncured bottom layer, and structural fracture at the tip within days. For that length, suggest hard gel, acrylic, or a tip-based extension system instead.
A beginner tech says "I will just file the shape to round after the cure". Why is that expensive?
Files remove structural mass from the apex, and the apex is the load-bearing feature of the whole build, so filing to shape is filing into the strength of the set. Fixing shape while the gel is still wet costs a few seconds with the brush tip. Fixing shape after the cure costs minutes of filing, generates dust and heat, risks the client's natural nail under a beginner's hand, and produces a set that breaks sooner.
A finished set has trapped air bubbles. What are three technique causes and one prep-stage cause?
Three technique causes: pressing the brush down onto the layer (which folds air in), going back and forth over the same stroke (which disturbs an already-settling surface), and pressing the middle of the bead first with no exit path for air at the sides. One prep-stage cause: the natural nail plate was not fully dehydrated before the base coat, so trapped surface moisture volatilized under the lamp and pushed micro-bubbles up into the layer above.


