

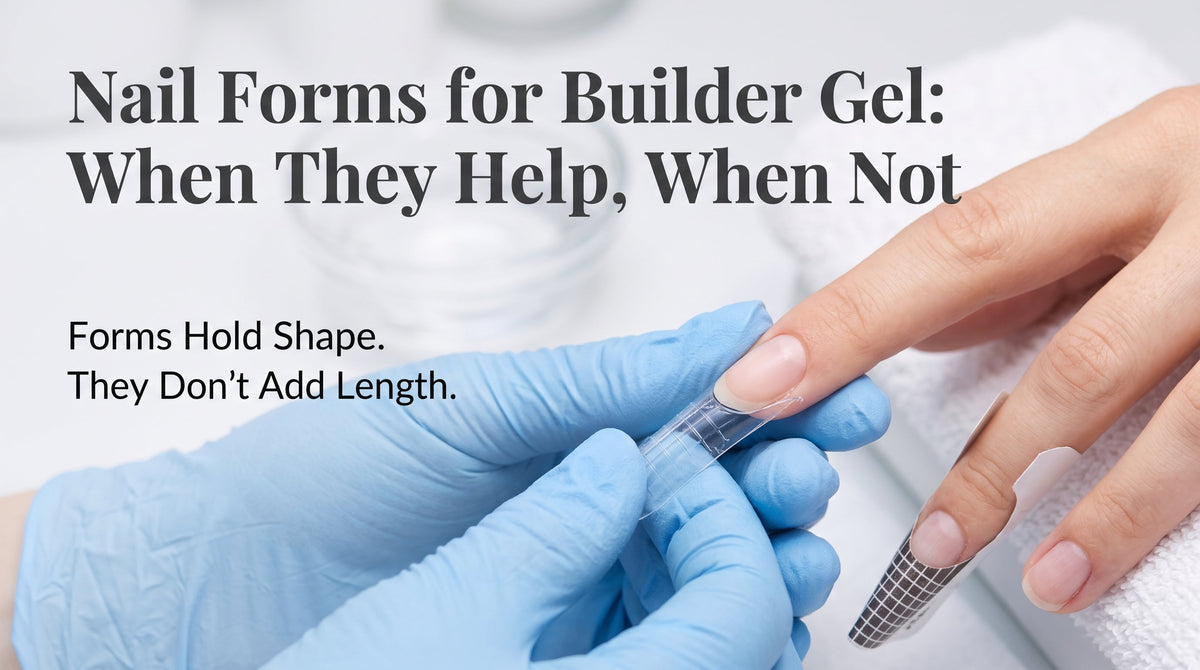
A form does not turn builder gel into hard gel. The 2 to 3 millimeter extension ceiling on builder gel is the material's limit, not the tool's, so slipping a form under the free edge does not add reach. What forms actually do is support the shape while gel cures: they hold the outer edge, keep ten fingers on a common axis, and give a curve the gel would otherwise settle out of. This article covers the two form types, the five checks that must happen before curing, the cases that do not need a form at all, and the brush and file choices that go with them.
Fast facts
- The 2 to 3 mm ceiling on builder gel extension belongs to the material, not the form. Adding a form does not lift it.
- Forms do three jobs: hold the outer edge, keep the axis, and preserve a curve. All three are shape jobs, not length jobs.
- The single largest technique rule: slide the form in, never press it in. Pressing traps air and creates the exact gap that fails.
- The gap test takes one second: run a finger underneath the free edge. If light passes through, the seal is not finished yet.
- Documentation on brushes for builder gel specifically is thin. This article says what is known and where the gaps are.
What Forms Are Actually For
The keyword group around nail forms for builder gel and its variants pulls roughly a thousand searches every month, and behind that number sits an expectation that has to be addressed on the first line: many technicians and buyers reach for a form because they think a form is what lets builder gel extend like hard gel. That is not what a form does. The extension ceiling on builder gel is documented in the CEO-approved technical FAQ as roughly 2 to 3 millimeters (consistent with builder gel manufacturer technical documentation and the product family's own technical FAQ), with any longer extension explicitly not recommended. That ceiling belongs to the resin chemistry, not to the tool held against it. A form does not make gel harder, and gel that is not hard enough to carry length will not be rescued by any form.
The three jobs a form actually performs are all in the shape category, not the length category. First, the form holds the outer edge in place while the technician builds a short extension out over it, so gel does not sag before it cures. Second, the form keeps a common axis across all ten fingers, which is what makes a set look uniform rather than eleven directions. Third, the form imposes a curve that gel would otherwise self-level out of, so the extension shows a defined arch rather than collapsing flat.
The gel used inside those three jobs still matters: bottle-format builder gels such as SNS Builder Gel In The Bottle (25 shades, HEMA-Free and TPO-Free 0.5oz) and LAVIS Builder Gel In The Bottle B1 and B2 (72-color set) self-level inside the form and reward a light hand, while denser jar-format lines such as LAVIS Builder Gel In The Jar (18 shades, 30ml) hold their placement inside the form even before the lamp closes.
One line for the shop. Forms hold shape while gel sets. Gel carries load. If the gel is not the right choice for the length, no form makes it one.
Paper Forms vs Dual Forms
Two different tools with two different workflows, and each has its own signature failure. Choose based on the case sitting in the chair, not on preference alone. The gel format inside the form makes a small but real difference to the workflow: bottle-format lines like SNS Builder Gel In The Bottle and LAVIS Builder Gel In The Bottle B1 and B2 flow into the form's corners on their own. Jar-format lines like LAVIS Builder Gel In The Jar and LAVIS Builder Gel Jar Non Sticky sit where the brush placed them, which gives the technician more direct control over apex position at the cost of a slower placement pass.
| Paper form | Dual form (plastic mold) | |
|---|---|---|
| Placed | Underneath the free edge | Inside the mold |
| Shape control | Manual control | Mold's fixed curve |
| Skill level | Higher | Lower and easier |
| Signature failure | Gap between free edge and form | Trapped air bubble from pressing |
| Best fit | Specific custom curve; harder cases | Speed sets, ten uniform fingers |
Technical documentation names the most common paper form failure explicitly: leaving any gap between free edge and form creates a weak foundation from the very first second, because the extension has nothing to rest on where it needs support most. That failure has a one-second field check covered in the next section.

The Gap Test: Run a Finger Underneath
Before any gel is loaded, before any cure light comes near the nail, one physical check separates a paper form that will hold from one that will fail: run a finger underneath, from the base of the free edge outward, and check that no light passes between form and nail. A visible light gap means the free edge and the form are not flush yet. That gap is where water and bacteria enter later, and it is exactly the spot lifting starts from.
The three angles to check from
- From above. The midline of the form must line up with the central axis of the finger. Off-axis here means an off-axis extension for the whole service.
- From the side. The form must follow the natural downcurve of the free edge, not sag away from it. A sagging form leaves gel with no support underneath.
- From underneath. No light through. This is the definitive test. Light passing under the free edge means the seal is unfinished, no matter how good the fit looked from above.
Five Checks Before You Cure
These apply to both form types. Every form failure is correctable before curing and almost none of them are correctable after, because cured gel bonded to a badly seated form leaves only two options: file it back down or start over.
| # | What to check | Best angle |
|---|---|---|
| 1 | Arch height underneath: is there enough clearance under the form for gel and finger? | From below |
| 2 | Two sides symmetrical and parallel to the finger's axis | From above |
| 3 | Apex height: the arch peak sitting in the correct load-bearing zone | From the side |
| 4 | Center line matching the finger's longitudinal axis | From above |
| 5 | Base stability: the mold does not shift when pressed lightly | Light press test |
Load gel into the mold, then slide the mold in from the fingertip at a low angle until it seats flush against the plate. Do not push straight down onto the finger. The difference is not stylistic: pressing displaces air sideways into pockets that end up at the seam between plate and extension, and that seam is precisely where the extension carries load.
What each checkpoint catches, in order
- Arch height under the form. Insufficient clearance is the failure that produces mid-nail pressure ridges after cure. The mold looks fine from the top but the underside is pinning gel flat against the plate rather than letting it seat naturally.
- Two sides symmetrical. Asymmetry here shows up as a set where a few fingers appear to angle inward or outward. That is not a shape problem in the extension itself; it is an axis problem baked in at form placement.
- Apex height in the right zone. An apex placed too far forward gives an extension that flexes and breaks at the wrong point. An apex placed too far back gives no structural spine at all.
- Center line to axis. This is the checkpoint most often skipped, because from directly above a slight misalignment is easy to miss. A rotated form produces an extension that looks correct on the finger but reads as off-axis in every photo.
- Base stability. If the base moves under a light press, it will move under gel weight, and it will finish curing in a position slightly different from where it started. Stability at the base is what makes the whole placement repeatable.
Two order-of-operations details
- Sequence. Press down from the base of the nail first, then sweep outward toward the fingertip. Do not press hard in one place.
- Overflow onto skin. If gel migrates onto skin during application, wipe it off with a cotton-free brush and cleanser BEFORE curing. After curing, the only removal is filing, and filing against skin is not an acceptable outcome.
For your bench: five checks, three angles, one hero rule (slide in, never press in). That is the whole seating protocol.
Three Tips That Work with Any Form
- Go one size larger, then adjust. The natural instinct is to pick the closest snug fit. That fit does not exist; nails vary too much. Pick one size up and adjust down to the fit.
- Seed the tip. Place a small drop of gel on the free edge tip of the natural nail before applying the mold. This eliminates the pinhole gap that otherwise sits at the plate-extension junction, the exact spot that fails first.
- Check the underside before curing. Flip the hand upside down and look at the mold from below one more time before cure. If any pocket, air bubble, or lifted edge is visible from underneath, the mold has to come off and go on again. This one habit prevents most post-cure form disasters.
The apex height in checkpoint 3 above sits at the intersection of form technique and structural gel mechanics. For the apex-only deep-dive, including the ten-second structure check that identifies whether the arch is placed correctly for load, a dedicated apex placement companion article is in production for the M1 module (coming soon).
When You Do Not Need a Form at All
A form is not always the answer. Applying one to a case that does not need it adds time, adds failure modes, and sometimes forces the technician into a service the material does not support. The rule for form selection is by case type, not by default. A short overlay done in bottle-format builder gel (for example SNS Builder Gel In The Bottle or LAVIS Builder Gel In The Bottle B1 and B2) is the classic no-form case: the material handles the reinforcement job on its own, and adding a form only introduces air pockets to worry about.
| Case | Form needed? |
|---|---|
| Overlay on natural nail, no extension added | No, there is no protrusion to support |
| Short extension (about 2 to 3 mm) on a client with a good nail bed foundation | Optional, many technicians build this freehand at this length |
| Short extension on a client with short nails or no free-edge foundation | Yes, the form provides the platform the natural nail cannot |
| Bitten, damaged, or misshapen nails with no free edge to work against | Yes, the form gives a flat plane to build against from scratch |
| Ten fingers that must look identical, done at speed | Dual form fits this best |
| Client wants visible length (past the 2 to 3 mm ceiling) | NOT a builder gel case, even with a form |
The last row is the important one. If the client wants real length, the answer is not "a form plus builder gel". The answer is a different service and a different material. Attempting to force length with builder gel and a form produces a bulky, breakable extension that reflects poorly on the technique, not on the gel.
Two geometry mismatches that override the case table
A curved dual form on a naturally flat nail plate contacts at two edges only, with a visible gap through the center. Forcing gel into that gap produces a hollow underneath that reads as a lifting extension within days. On that plate shape, either switch to a paper form and build the curve manually, or step down to an overlay service without the extension. The mismatch will not resolve by pressing harder.
A warped or reused mold that no longer holds its original shape is the second override. The tell is a small visible gap along the mold edge when it sits at rest, before any gel is loaded. Once a mold has taken a permanent bend, it stays bent, and each new application starts with the same gap built in. Retire the mold; a compromised tool spreads the compromise across every set it touches.
Brushes for Builder Gel

A note on documentation before this section starts. Industry documentation on brushes for builder gel specifically is thin. A grep of the internal 147 KB tool documentation returns zero occurrences of the word "brush", meaning what follows below is drawn from general tool-setup guides that cover gel brushes broadly, not builder-gel-specific literature. Where the underlying source is solid, this article says so. Where it is not, this note is why.
That said, the five brush shapes used across gel work all serve identifiable roles, and matching shape to job is the majority of the brush-selection decision. The brush question also splits along product format. Bottle lines such as SNS Builder Gel In The Bottle and LAVIS Builder Gel In The Bottle B1 and B2 ship with the applicator brush attached, so those five brush shapes below serve alongside that in-bottle brush, not instead of it. Jar-format lines such as LAVIS Builder Gel In The Jar and LAVIS Builder Gel Jar Non Sticky require the technician to bring a separate detail brush to the workstation to load the product from the jar.
| Brush type | Shape | Job |
|---|---|---|
| Gel brush | Wide, flat | Spreads gel evenly across the plate. Pick one that carries a moderate load without over-flooding. |
| Flat square-tip | Square edge | Places bulk and builds structure over the extension or overlay area. |
| Liner brush | Long, thin bristles | Draws lines, French tips, and detail. Also pulls gel out to the sidewall edges. |
| Detail brush | Short, gathered bristles | Adjusts small pockets of gel without disturbing the surrounding surface. |
| Cleanup brush | Thick, angled bristles | Loaded with cleanser to wipe gel off skin BEFORE cure. Should be dedicated to this task only. |
Three brush-care rules that ARE well documented
- Wipe gel off bristles immediately after use. Uncured gel left in the bristles will cure permanently the first time light hits it. Wipe the brush on a lint-free towel the moment it leaves the nail.
- Store away from light. This includes ambient light, not just direct lamp light. Store brushes lying down or standing upright in a closed box, never resting on a tabletop under the lamp. This rule is violated in most salons every day, and it is the reason so many brushes go stiff before they should. The mechanism is consistent with polymer chemistry literature on UV and LED photopolymerization in the 365 to 405 nm band: the lamp is the strongest source of that band in the room, and cured gel between bristles glues them together at whatever angle they were sitting in.
- Do not share a brush across product types. Mixing products in the same brush changes the chemistry of both and ruins the brush. Dedicated brushes per product category is the correct approach.
The pattern I see across salons that hit brush cost frustrations is a common one: they assume the industry has a definitive answer somewhere they have not found. Sometimes it does not. Grep the internal docs, find zero hits on the word that matters most to the section, and that changes what a serious article is allowed to promise. The transparency call in this section is not a hedge, it is the correct posture when the record is thin. Buy a brush that fits the format you use, watch how it behaves after ten sets, and let observation decide what a manual cannot. Salons that shift to this posture stop churning through brushes and start replacing them on a signal (bristles lose spring, gel slides off rather than sitting on) rather than on a calendar or a suspicion.
Two practical decisions that are not in any manual. First: when a brush stops holding gel the way it did new, that is not user error, and it is not something cleaning fixes. Bristles absorb residue over months of contact with resin and cleanser, they lose their spring, and eventually gel starts sliding off the brush rather than sitting on it. A brush that has moved into that phase is a brush that needs replacement, not a cleaning routine. Working with a spent brush is why some sets show inconsistent thickness with no other explanation.
Second: dedicated brushes per station make sense once a technician is doing more than one product category per day. A single shared brush is cheaper on day one and much more expensive by the end of the month, because ruined bristles from cross-product contamination retire faster than dedicated brushes. This is one of the few tool decisions where buying more upfront saves money in a measurable timeframe.
Files, Buffers and E-Files
Beyond forms and brushes, four hand-tool categories carry most of the day's work. Documentation is denser here and the specifications are less contested.
| Tool | When to use | The rule that matters |
|---|---|---|
| 180-grit file | Buffing the natural plate before prep; shaping after cure | Move in one direction only. Do not saw back and forth, and do not stay in one spot for more than two or three passes. |
| Buffer | Smoothing a matte finish | Stop when the plate loses its natural shine. Buffing past that point thins the plate. |
| E-file | Reducing an old layer during a fill; assisting removal | This is a mid-to-advanced tool. For newer technicians, hold speed to 5,000 to 8,000 RPM (consistent with standard e-file training curriculum ranges), let the machine's weight provide the force, and keep the bit moving at all times. |
| Dust brush | After every filing operation | Dust trapped under gel becomes a physical barrier and a bubble source. Gel is applied to plate, not to plate-plus-dust. |
| Lint-free wipes | Cleansing, wiping the inhibition layer | A cotton towel leaves fibers embedded in the gel. Use lint-free from prep through finish. |
The full toolkit build-out, including lamp selection criteria, e-file specifications by task, the two grit notation systems, and the purchase order for a new station, will be covered in a dedicated tools article coming soon in the M2 module. This article handles what belongs with forms.

Related Articles
This article is one SPOKE in the Cure, Lamps and Tools cluster. Companion pillar articles now live on the SNS Nail Education blog:
- Apex and C-Curve: The Physics of Nail Shape. The structural context for what a form is actually building on the nail.
- Builder, Hard, Soft, Polygel, Rubber Base: Five Gels Compared. Where builder gel sits among the gel families and why the 2 to 3 mm ceiling belongs to this specific chemistry.
- Nail Prep for Builder Gel: The Product Order That Holds. The prep chain that determines whether the layers on top of the form hold at all.
Additional companion articles in production: the M1 curing time article (does builder gel need to be cured, lamp type, cure time, why curing fails), the M2 tools article (best tools for builder gel: lamp, e-file bits, forms and brushes), the M1 brush article (best brush for builder gel application and how to keep it clean), the M1 extension methods article (builder gel tips, gel-X and forms), the M1 apex placement article (the ten-second structure check), and the M1 Builder Gel HUB (how to apply builder gel step by step). Links will be added as they publish.
How this article was developed
The 2 to 3 mm extension ceiling framing, paper versus dual form workflow, five-checkpoint seating sequence, gap test diagnostic, form-versus-no-form case table, brush shape mapping, and file tool rules documented here draw on SNS technical documentation and curriculum used in the SNS training program, the CEO-approved technical FAQ for builder gel (which establishes the 2 to 3 mm ceiling), Nail Structure and Product Chemistry by Doug Schoon for nail-plate anatomy and file grit conventions, polymer chemistry literature on gel resin viscosity and UV and LED photopolymerization in the 365 to 405 nm band, industry pro nail consensus on form technique, and product line documentation for the SNS Builder Gel and LAVIS Builder Gel lines carried by SNS Nails.
Numbers preserved: the 2 to 3 mm extension ceiling for builder gel (CEO-approved, source-cited to the product family's technical FAQ), 180 grit for natural plate work, 5,000 to 8,000 RPM for e-file at the cuticle area (per standard training curriculum), 147 KB internal tool documentation with zero hits on the word "brush" (grep-verified transparency stat), 25 shades (SNS Builder Gel In The Bottle), 72 shades (LAVIS Builder Gel In The Bottle B1 and B2 set), 18 shades (LAVIS Builder Gel Jar 30ml set), 15g and 30g (LAVIS Jar Non Sticky formats), 0.5oz (bottle formats).
Numbers deliberately omitted: form remove seconds, flash cure seconds before C-curve, LED wattage, form prices, brush prices, specific drill bit codes and brand names, lamp model names. Timing and product-specific numbers vary too much across products and lamp models to fix as a rule. Where a per-product number matters, consult the product's own technical data sheet.
Brush section transparency disclosure. The brush content in this article carries a stated caveat. A grep of the internal 147 KB tool documentation returned zero occurrences of the word "brush". The material in that section is drawn from general tool-setup guides that cover gel brushes broadly, not from builder-gel-specific literature. That caveat is stated inline in the section, not hidden here. Competitors on this topic present brush recommendations as authoritative; this article says the record is thin and lists what applies broadly. The transparency is the article's E-E-A-T defense on that content.
Contrarian advice preserved: hold off on the e-file if still learning. Industry-standard tool guides often position the e-file as essential from day one. This article recommends deferring e-file training until manual filing is mastered, because e-file mistakes (heat burns, gouges, plate damage) are much harder to recover from than hand-file mistakes. That recommendation runs against the standard upsell path and is preserved here on the strength of the reasoning rather than the industry consensus.
Frequently Asked Questions
Does putting a form on builder gel raise the 2 to 3 mm extension ceiling? So what does a form actually do?
No. The 2 to 3 mm ceiling belongs to the material, not to the tool applied against it. Builder gel's resin chemistry is not built to carry loads longer than that, and no form changes the chemistry. What a form does is three things, all in the shape category: it holds the outer edge in place while gel sets, it keeps the axis common across ten fingers so a set looks uniform, and it imposes a curve that gel would otherwise self-level out of. Length is not on that list.
How do paper forms and dual forms differ? What is the signature failure of each?
Paper forms slide under the free edge; gel is then pulled outward onto them, giving full manual control over the resulting curve at the cost of a higher skill barrier. Dual forms hold gel inside the mold, which is then applied to the nail, giving a fixed curve and a lower skill barrier. The signature failure of a paper form is a gap between form and free edge that leaves the extension unsupported. The signature failure of a dual form is trapped air, produced by pressing rather than sliding the mold in.
List all five checkpoints before curing. What is the single largest rule about how to seat the mold?
One: arch height underneath, enough clearance for gel and finger. Two: two sides symmetrical and parallel to the finger's axis. Three: apex height sitting in the load-bearing zone. Four: center line matched to the finger's longitudinal axis. Five: base stability, the mold does not shift when pressed lightly. The single largest rule is SLIDE IN, NEVER PRESS IN. Pressing straight down displaces air sideways into pockets that end up at the plate-extension seam, the exact spot the extension carries its load.
What is the physical technique for checking a gap between free edge and form?
Run a finger underneath the free edge, from the base outward, and check whether any light passes between form and nail. Light passing through means the seal is not finished. Check from three angles: from above the midline of the form must match the central axis of the finger, from the side the form must follow the natural downcurve of the free edge without sagging away from it, and from below no light passes. The from-below check is the definitive one.
Which cases do NOT need a form? Which cases require one?
Overlay on a natural nail does not need a form because there is no protrusion to support. A short extension on a client with a good nail-bed foundation is optional; many technicians build it freehand. Cases that require a form: short extension on a client with short nails or no free-edge foundation, bitten or damaged nails with no free edge to work against, and speed sets where ten fingers must look identical (dual form fits this last case best). A client who wants visible length past the 2 to 3 mm ceiling is not a builder gel case at all, form or no form.
What are the three brush-care rules? Which one is most commonly violated in the shop, and why?
One: wipe uncured gel off the bristles immediately after use, because gel left in the brush cures permanently the moment light hits it. Two: store brushes away from light, including ambient light, not just direct lamp light. Three: do not share one brush across product categories, because mixed products change each other's chemistry and ruin the brush. Rule two is the most violated. Brushes end up sitting next to the lamp all day, catching UV between clients, and stiffen weeks before they should because the gel inside the bristles has been slowly hardening.
Should newer technicians use an e-file right away? If yes, what maximum rotation speed applies?
The recommendation is to hold off on e-file work until manual filing is mastered. E-file mistakes (heat burns, gouges, plate damage) are much harder to recover from than hand-file mistakes, and the injuries carry both clinical cost and lost trust. Technicians who do use an e-file while still learning should hold speed to 5,000 to 8,000 RPM, let the weight of the machine provide the pressure rather than pushing down, and keep the bit moving at all times. Staying in one spot generates heat quickly at any speed.


