

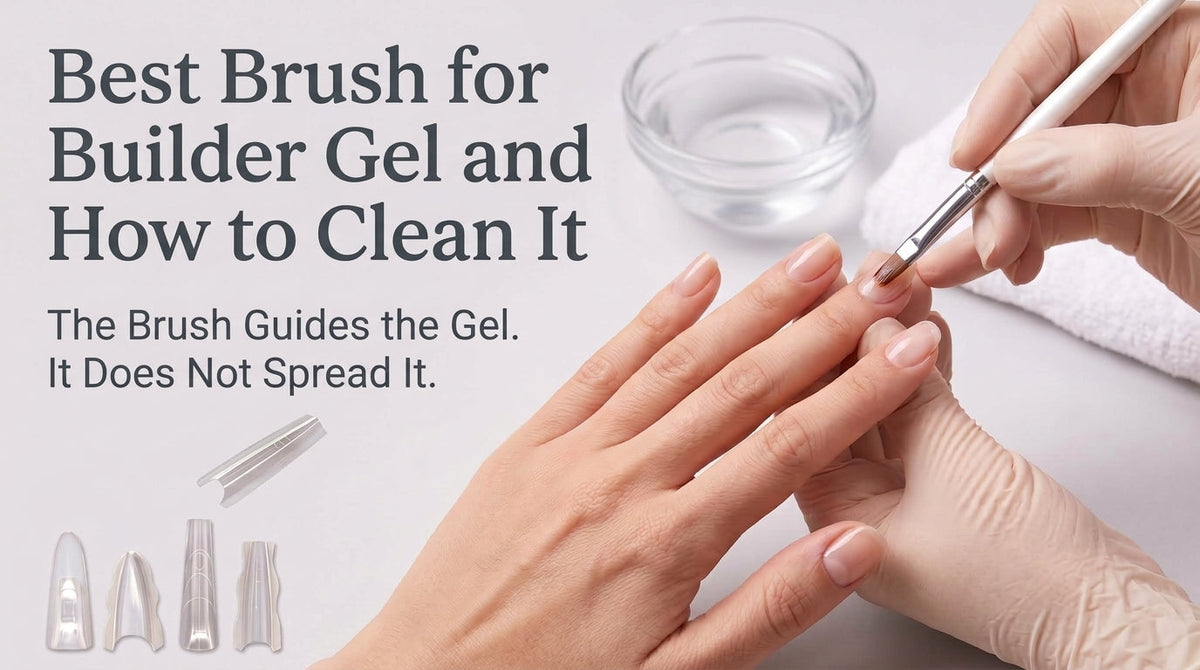
A builder gel brush does not spread gel. Gel spreads itself; the brush guides the gel toward the right position with the fewest strokes possible. Getting that idea right changes both what to look for when buying and why brushes stiffen so fast. The three brush properties that decide the surface, the five separate brushes on the workstation, the real reason bristles harden (it is not the gel), and the scope of the acetone rule all sit inside that reframe.
Fast facts
- The brush guides. The gel spreads itself. Over-brushing traps air and produces the exact defects the extra strokes were meant to fix.
- A stiff brush makes the technician brush more, not the gel spread less. The surface defect from a bad brush is upstream of the visible problem.
- Bristles harden because the gel on the bristles cures under ambient light, not because gel is sticky. The lamp on the workstation is the strongest 365-405 nm source in the room.
- "Acetone-resistant base" on a brush label refers to the FERRULE, not the bristles. It means the manufacturer knows acetone attacks the glue at the base.
- The bristles cannot be sterilized like metal tools. Protect them by keeping them clean, not by disinfecting after the fact.
Your Brush Guides the Gel. It Does Not Spread It.
The extension fundamentals text is direct on this: gel is self-leveling and wants to flow toward the lowest point, so the brush's job is to guide it with minimal strokes. Over-brushing traps air and disturbs the structure the gel would otherwise settle into on its own. The gel-polish literature says the same thing in different words: use the weight of the brush itself to glide across the nail, do not force or press down.
The reframe in one line. The brush is not a trowel for spreading. It is a pointer for guiding. Spreading is the gel's job. Once that is clear, the reason bad brushes ruin a surface stops being intuitive and starts being precise.
A worn brush does not fail by dragging gel poorly. It fails by forcing the technician to make additional strokes to compensate. Each extra stroke traps more air and disturbs more of the self-leveling layer underneath. The surface gets worse the more the brush touches it. A brush that stiffens quickly and costs an extra ten minutes per set is a common shop complaint, and the mechanism above is why.
The Three Things That Make a Brush Work
The gel-polish literature narrows streaking causes to two factors, brush pressure and layering method. Inside those two sits a property most technicians never inspect directly: a dry brush dragging across the nail. A brush that carries too little gel produces the same surface defect that a heavy-handed technician does. Three brush properties are diagnosable by eye, and each leaves its own signature on the finished surface. [Inferred] the diagnostic mapping below is extrapolated from the streaking literature and the load-and-glide literature.
| Brush property gone wrong | What the surface shows | What the reading is |
|---|---|---|
| Bristles too soft or splayed | One pass is not enough coverage; edges of the applied gel come out ragged and uneven in thickness | The brush cannot hold a straight edge, so it cannot draw a single clean line. Every touch-up traps more air. |
| Bristles too stiff for the gel's viscosity | Visible grooves in the gel; gel pushed sideways to the corners rather than sliding forward | Stiff bristles transmit sideways force instead of gliding. More visible on thicker gels. |
| Brush loads too little gel | Runs dry halfway across the nail; technician lifts, reloads, restarts, and the seam shows | This is the exact "dry brush dragging" defect the documentation names. Not a technician error. |
| Brush loads too much gel | Gel arrives on the nail faster than intended, self-levels aggressively, flows into corners | Wipe excess product off the brush before application. Less product, more passes. |
| Edge shape gone dull | Cuticle line reads soft, not sharp; product tends to migrate onto skin | The brush edge is what draws the line. A dulled edge cannot produce a sharp one no matter the hand pressure. |
The test at the workstation. See a surface defect? Do not change the bottle first. Try the SAME bottle with a different brush on a practice tip. If the defect disappears, the brush was the cause. If it remains, then consider the gel and prep. Changing a bottle to solve a brush problem is the most expensive way to fix nothing.
Five Brushes on Your Table, Five Different Jobs
The workstation carries five separate brushes, and none of them substitutes for any other without cost.
| Brush | Job |
|---|---|
| In-bottle brush (attached to bottle cap) | Applies bottle-form builder gel like gel polish. Not chosen separately, comes with the bottle. |
| Jar brush (polymer double-ended) | Scoops and places gel from a 30 ml jar. Soft-bristled, designed for both poly gel and builder jar work. |
| Liner brush | Draws lines and French, pulls gel toward the sidewalls, applies detail. The tool for edge control. |
| Cleanup brush | Fine-pointed, dipped in cleanser or 99% isopropyl, wipes gel off skin BEFORE curing. Should be dedicated to this task only. |
| Dust brush | Sweeps filing dust off the plate before product application. Must be dry, clean, and never in contact with gel. |
Two details worth naming. First, the dust brush is not a gel brush, and treating it like one contaminates both the dust brush and the gel container. Dust does not just reduce adhesion; it blocks it. Second, the cleanup brush is only useful BEFORE cure. Once the gel has cured, the only removal is filing, and filing along skin risks the client.

In-Bottle Brushes: What You Cannot Choose
Bottle-form builder gel comes with the brush attached, so the technician's job is not choosing that brush but READING what design decision it embodies and adding loose brushes to compensate for what it does not do. The four manufacturer descriptions below appear here for the axis they reveal, not for comparison of which is better. Names appear once each as source attribution for the design quotes and are not repeated as recommendations.
Representative examples carried on SNS Nails include SNS Builder Gel In The Bottle (24 shades in a HEMA-Free and TPO-Free 0.5oz format) and LAVIS Builder Gel In The Bottle B1 and B2 (72-color set, 0.5oz). Both ship with the applicator brush integrated, so the technician inherits that brush design and pairs it with the loose brushes above.
| What the label says | What axis it names |
|---|---|
| OPI Intelli-Brush: "rounded edge hugs the cuticle, fan-out bristles cover nail surfaces efficiently, a patented channel stem regulates product pick-up and release" | Edge shape, fan-out width, and a mechanism that regulates HOW MUCH gel is loaded per pass. |
| Aprés Brush-X: "dense PBT fibre brush... denser and more compact than standard brushes, giving better control and more efficient product use" | Bristle density and synthetic PBT fiber choice. |
| Kiara Sky FiberBrush: "hugs the cuticle... fewer strokes required" | Number of passes needed, which is exactly the variable named above as the failure mode of a bad brush. |
| Gelish: "the original brush-in-bottle" | The category-establishing bottle-plus-brush format. |

The pairing everyone misses: brush size and gel viscosity
Brush size and gel viscosity are one design decision, not two independent choices. Thinner-viscosity gels need SMALLER brushes so the amount released per pass stays controlled; releasing too much of a thin gel produces the "it self-leveled straight into the cuticle" complaint. Thicker-viscosity gels need brushes that hold MORE gel, otherwise the brush runs dry halfway and produces the "thick as acrylic, applies in chunks" complaint.
A concrete example of this pairing across the product lines SNS Nails carries: SNS Builder Gel In The Bottle and LAVIS Builder Gel In The Bottle B1 and B2 sit at the self-leveling viscosity tier and ship with small applicators matched to controlled release. Jar-format lines such as LAVIS Builder Gel In The Jar (18 shades, 30ml) and LAVIS Builder Gel Jar Non Sticky (per-shade 15g and 30g) are denser and call for a slightly larger detail brush picked up separately, since the product releases less per pass.

Reading an unfamiliar bottle in 30 seconds
Open the cap. Wipe the brush against the bottle mouth. Look at the gel drop hanging on the bristles. If the drop runs off quickly, the gel is thinner and the brush releases fast, so place LESS, place FURTHER from the cuticle. If the drop sits stable on the bristles, the gel is thicker, so place and WAIT for the gel to self-level, do not pull it with the brush. Reading a familiar bottle such as SNS Builder Gel In The Bottle or LAVIS Builder Gel In The Bottle B1 and B2 the first time makes the pattern easier to recognize on any subsequent bottle: the drop hangs briefly, then flows off the bristles at a moderate speed, which is the visual signature of the self-leveling builder tier.
Round brush or square brush? An unresolved industry question
The brush-shape choice between round and square is documented in the internal record as an open question at the manufacturer level, not a settled preference. Some product lines ship with round brushes described as easier for newer technicians to keep clear of the cuticle; others ship with square brushes described as producing more even color coverage. The practical note for readers: if a familiar bottle is reformulated with a different brush shape and the gel suddenly "feels wrong", the sensation is real. The cause is the brush shape, not the gel. Ask the supplier which shape ships in the current run before switching brands. Do not make a purchase decision on the strength of this article alone; this is a shop-level discussion in progress.

Natural Hair vs Synthetic: Why the Acrylic Answer Is Not the Gel Answer
This is the topic most easily copied from the wrong source, because almost all written material on nail brushes is written about acrylic brushes. Kolinsky natural-hair brushes are described in the acrylic literature as excellent at holding liquid evenly. In acrylic, that strength is used directly: the brush is loaded with a monomer, then used to pick up powder that forms a bead.
Builder gel does not use that step. There is no monomer to hold, no bead to form. The Kolinsky's biggest technical advantage is unused, while its delicacy remains. This is why bottle-form builder gel brushes are almost universally synthetic: PBT fiber, dense fan-outs, engineered load channels, built around the specific job.
Why Gel Brushes Go Stiff: It Is Light, Not Gel
This is the section that changes behavior fastest, and it starts with three verified premises. First, gel cures under light in the 365-405 nm band, consistent with UV and LED photopolymerization wavelength standards documented in polymer chemistry literature; this is the underlying chemistry. Second, ambient light in the shop contains portions of that band, and the lamp on the workstation is the strongest source of it in the room. Third, product-storage instructions on multiple gel products state directly that light exposure inside a CLOSED bottle can cause premature thickening or curing. The non-sticky variant in the same product family, LAVIS Builder Gel Jar Non Sticky, reduces one specific version of this failure mode by curing without an inhibition layer, so residue that would otherwise cross-contaminate a brush between coats is not present in the first place; the ambient-light rules below still apply.
[Inferred] if light through a closed bottle can thicken and prematurely cure gel, then gel sitting exposed on the bristles of a brush next to the cure lamp cures much faster. Cured gel between bristles glues them together at whatever angle they were sitting in, and that fused-at-angle state is exactly what technicians call "stiff" or "splayed".
The behavior change is small and free. Cap the bottle immediately after loading the brush. Do not leave the brush lying face-up in the light of the cure lamp, because the strongest 365-405 nm source in the room is running most of the day. When stepping away, put the loose brush in a covered box or cap the brush hood. The M0 curing chemistry companion article (coming soon) covers the underlying wavelength framework in more depth.
The frustration I hear most often on this topic is a version of "the ten-dollar brush went stiff in a week and I bought another". Then a second one. Then a third one. The bottle of gel is expensive. The lamp is expensive. The technician's time is expensive. The brush is ten dollars in the same shopping basket. What ends the cycle is not buying a different brush; it is changing where the brush lives between clients. Bottle capped as soon as you load. Brush in a covered box when you step away. Brush handle turned away from the direct light path of the workstation lamp. That is a habit, not a purchase. Once a salon shifts that habit across the team, the brush budget line stops being the recurring surprise it used to be.
Four In-Service Rules That Cost Nothing
- Wipe the brush before every finger. Documentation is direct: wipe excess product off the brush before application, less product with more passes. Both surface control and brush protection improve at the same time.
- Never dip a dirty or dusty brush back into a shared jar. The monomer-dish documentation names this contamination and applies exactly to a shared jar: introducing debris and bacteria over time by dipping a used or dusty brush back in.
- Do not touch the brush with product to skin. This is an occupational-safety rule, not an aesthetic one. Repeated skin contact with uncured product is a technician's exposure risk, and the brush touches the product more than any other object in the workflow.
- Clean up spills BEFORE curing, and cure right after cleaning. The documented sequence: wipe with a cleanser-loaded cleanup brush, then cure immediately after cleanup to lock in the edge. Waiting after cleanup lets the gel migrate back to where it was just wiped from.
One more rule specific to polygel. Slip solution guides the polymer gel product. It is not a thinner, not a remover, and not a substitute for brush control technique. Slip solution is not brush wash.

The Acetone Question: What Is Documented and What Is Not
Being honest about source scope helps the reader here. Three things ARE documented (consistent with nail acrylic curriculum and Nail Structure and Product Chemistry by Doug Schoon). Kolinsky natural-hair brushes for acrylic work are explicitly banned from acetone. Synthetic acrylic brush manufacturers advertise "acetone-resistant ferrule and base". Safety documentation uses acetone to dissolve cured gel off metal drill bits during cleanup.
The label phrase, read correctly. "Acetone-resistant base" refers to the FERRULE: the metal band and the glue that holds the bristles to the handle. It does NOT say the bristles themselves tolerate acetone. Manufacturers list this claim because acetone attacks the glue at the base; it is not an invitation to soak the whole brush.
What is NOT documented: no source covers cleaning BUILDER GEL brushes with acetone, and no source covers synthetic brushes and acetone as a care instruction. [Inferred] the reasoning that extends the Kolinsky ban to gel brushes stands up: if acetone dissolves cured gel off metal drill bits, it also attacks the glue at a brush base, which is why manufacturers advertise the acetone-resistant ferrule in the first place. Ferrule failure means shedding bristles, and shedding is not repairable.
The safe rule while the record is being completed. Read the specific brush manufacturer's care instructions first. When no instruction is provided, do NOT soak any brush in any solvent. A stiffened brush can sometimes be reshaped. A brush that has shed bristles cannot.

Sanitizing a Brush: Handle Yes, Bristles No
Salon-owner concerns about hygiene are legitimate and appear as one of the most common line items in the shop-owner pain list. The prep-and-hygiene documentation includes brushes on the sanitize list at a specific level: product bottle necks and BRUSH HANDLES. Not the bristles. Bristles cannot be sterilized the way metal tools can, and the same document explicitly states that sandpaper should be discarded, not disinfected, because porous material does not tolerate the process.
For a brush, the practical implication is that the defense is upstream, not downstream. Prevent contamination by keeping the bristles from touching skin, from sweeping dust, and from being dipped back into a shared jar when dirty. Once the bristles are contaminated, no wipe-down fully undoes it. This is why the four in-service rules above matter more than any single end-of-shift wash.
For your bench: handle sanitized, bristles protected upstream, brush stored covered and away from the lamp. That is the full brush-hygiene protocol.
Related Articles
This article is one P3 SPOKE in the Cure, Lamps and Tools cluster. Companion pillar articles now live on the SNS Nail Education blog:
- Builder, Hard, Soft, Polygel, Rubber Base: Five Gels Compared. Where builder gel sits among the gel families and how bottle versus jar format affects brush pairing.
- Apex and C-Curve: The Physics of Nail Shape. The structural context for what a brush is actually building on the nail.
- Nail Prep for Builder Gel: The Product Order That Holds. The prep chain that determines whether the brush strokes on top hold at all.
Additional companion articles in production: the M0 curing chemistry article on UV and LED lamp wavelengths (drives brush stiffening), the M6 forms article on when forms help and when they do not (companion technique), the M1 Builder Gel HUB (application flow the brush is part of), the M1 curing time article on how long to cure builder gel, and the M2 tools article on lamp, brush, file and dual forms buying criteria. Links will be added to this page as they publish.
How this article was developed
The brush-property-to-surface-defect diagnostic, five-brush workstation map, light-stiffening mechanism, acetone scope, and sanitization boundary documented here draw on SNS technical documentation and curriculum used in the SNS training program, industry-standard nail brush documentation, polymer chemistry literature on UV and LED photopolymerization in the 365-405 nm band, Nail Structure and Product Chemistry by Doug Schoon for the Kolinsky and acrylic context, product line documentation for the SNS Builder Gel and LAVIS Builder Gel lines carried by SNS Nails, and four in-bottle brush manufacturer descriptions used as design-axis source quotes (OPI Intelli-Brush, Aprés Brush-X, Kiara Sky FiberBrush, and Gelish) rather than as endorsements.
Numbers preserved: the 365 to 405 nm gel cure wavelength band, 99 percent isopropyl for the cleanup brush, 30 ml jar format, 25 shades (SNS Builder Gel In The Bottle), 72 shades (LAVIS Builder Gel In The Bottle B1 and B2 set), 18 shades (LAVIS Builder Gel Jar 30ml set), 15g and 30g (LAVIS Jar Non Sticky formats), 0.5oz (bottle formats).
Numbers deliberately omitted: specific cure seconds, LED wattages, product prices, wear time in weeks, brush replacement intervals ("used it a week and it went stiff" is a shop complaint, not a standard interval and not a source-supported number), and unsourced end-of-shift brush-cleaning times. Where a per-product number matters, consult the product's own technical data sheet.
[Inferred] transparency markers. Two claims in this article extend beyond directly documented material and carry inline [Inferred] tags: the brush-property-to-surface-defect diagnostic mapping (extrapolated from the streaking literature and the load-and-glide literature) and the light-triggered brush stiffening mechanism together with the acetone risk extension from documented Kolinsky ban and documented acetone-resistant-base manufacturer claims. Those markers are intentional. They separate quoted material from extrapolated material so a reader can weight each claim accordingly. This transparency is the article's E-E-A-T defense on its most valuable content.
Acetone scope kept narrow. The documented ban applies to Kolinsky natural-hair brushes for acrylic work. The documented manufacturer phrase is "acetone-resistant base" and it refers to the ferrule glue, not the bristles. No documented rule exists for cleaning builder gel brushes with acetone. The article extends only to "do not soak any brush in any solvent without the brush manufacturer's own instructions" and does not overclaim to "never use acetone on any brush".
Unresolved: round versus square brush shape. This is an open industry question at the manufacturer level. Article discloses that the shop-level discussion is in progress and directs readers to ask their supplier which shape ships in the current run before switching brands, rather than make a purchase decision on the strength of this article alone.
Frequently Asked Questions
In one sentence, what is the brush's job with builder gel, and what is the gel's job?
The brush guides the gel to the right position with the fewest strokes; the gel spreads itself. Any additional stroke past what guidance requires traps air and disturbs the self-leveled surface underneath.
Name the five brushes on the workstation and the job of each. Which one NEVER touches gel?
In-bottle brush for bottle-form builder gel application. Jar brush for scooping and placing gel from a 30 ml jar. Liner brush for lines, French, and edge control. Cleanup brush for wiping product off skin before curing. Dust brush for sweeping filing dust off the plate. The dust brush never touches gel; it must stay dry, clean, and dedicated to that single job.
Why do builder gel brushes go stiff? Is the culprit gel or light, and how does the answer change what to do about it?
The culprit is light, not gel. Gel between bristles cures under ambient 365 to 405 nm exposure, and the workstation lamp is the strongest source of that band in the room. The fix is not longer washing but keeping the brush out of the light. Cap the bottle after every load, do not leave the brush face-up next to the lamp, and put the brush in a covered box when stepping away.
The surface comes out streaked and grooved. Check the brush first or the bottle first? And how do you check in two minutes?
Check the brush first. The streaking literature narrows the causes to brush pressure and layering methods, both of which are brush-mediated. Two-minute test: apply the SAME bottle with a different brush on a practice tip. If the streaking disappears, the brush is the cause. If it remains, then investigate the gel and prep.
A thin-viscosity gel: pair it with a large brush or a small brush, and why? What complaint does the wrong pairing produce?
Small brush. A thin-viscosity gel releases fast, so a large brush deposits more than the technician intended per pass, and the gel self-levels aggressively into the cuticle and sidewalls. The complaint that follows is "it self-leveled too fast, it flooded everywhere". Small brush releases less per pass, letting the technician control placement.
What does "acetone-resistant base" on a brush label actually mean, and what does it NOT mean? Which brush type does the documented acetone ban apply to?
"Acetone-resistant base" refers to the FERRULE, the metal band and the glue that holds the bristles to the handle. It means the manufacturer knows acetone attacks that glue. It does NOT say bristles tolerate acetone soaks. The documented ban applies to Kolinsky natural-hair brushes used for acrylic work. Extending to gel brushes is not directly documented, but the ferrule risk applies to any brush construction, so soaking any brush in any solvent without the manufacturer's specific instruction is not advised. [Inferred]
Why is a Kolinsky natural-hair brush excellent for acrylic work but its main strength unused for builder gel?
Kolinsky's advantage is its ability to hold liquid evenly. Acrylic work uses that advantage directly: the brush is loaded with a monomer, which is then used to pick up powder that forms a bead. The liquid-holding capacity decides the bead-forming ratio. Builder gel has no equivalent step. There is no monomer to hold, no bead to form. The gel brush only picks up an amount of gel and places it, so Kolinsky's greatest strength is unused while its delicacy and specific care requirements remain.
When gel migrates onto skin: which brush, what solvent, before or after cure, and why cure right after cleanup?
Use the cleanup brush, fine-pointed and dedicated to this task. Load it with cleanser or 99 percent isopropyl. Wipe BEFORE cure, always. After cure, the only removal is filing, and filing along skin risks the client. Cure immediately after cleanup to lock the edge in place; waiting after wiping lets the still-uncured gel migrate back onto the skin that was just cleaned.
When sanitizing a brush, what part gets sanitized? How does the other part get protected?
The handle gets sanitized. The bristles cannot be sterilized the way metal tools can; the same documentation states that porous materials like sandpaper should be discarded rather than disinfected. Protect the bristles upstream: no skin contact, no dust sweeping, no dipping a dirty brush back into a shared jar. Once bristles are contaminated, no post-hoc wash fully undoes it.
A technician says "my ten-dollar brush went stiff and lumpy in a week". Answer in three sentences, without blaming the brush brand.
The brush did not fail from being cheap; it failed because the gel on the bristles cured under ambient light from the workstation lamp. Cured gel glues bristles together at the angle they were sitting in, and that fused-at-angle state is exactly what "stiff" means. Change the storage habit (cap the bottle after every load, keep the brush out of the lamp's light path, put it in a covered box between clients) and the same ten-dollar brush lasts multiples longer.


