

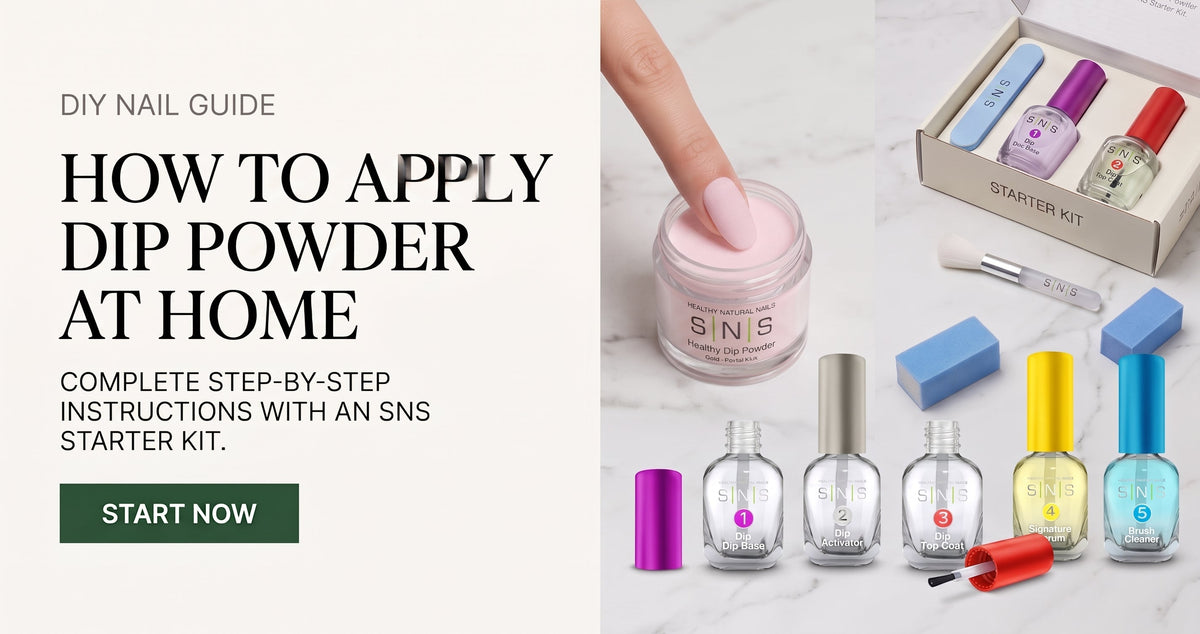
How to do SNS dip nails at home in 8 steps: prep the nail, brush on a thin coat of Dip Base Coat, dip into Foundation powder, then base and dip into your color, and brush off the excess. Apply Dip Activator and wait four minutes, file and buff, do a second Activator coat and wait three more minutes, then Top Coat and Signature Serum. No lamp anywhere in the process. Plan on about 45 minutes for a first set, and know that prep is most of what decides whether it lasts.
1. How Do You Apply Dip Powder at Home? The Overview
How to apply dip powder at home comes down to 8 steps and about 45 minutes for your first set, most of that waiting on the activator and the top coat. There's no lamp, the odor is low, and the technique forgives a shaky first coat in a way gel and acrylic don't. With the SNS DIY kit the sequence is: prep the nail plate, apply Dip Base Coat, dip into Foundation powder and repeat, then base and dip into your color twice, and brush off the excess. Then apply Dip Activator to harden the powder, file and shape, apply Dip Top Coat, and finish with Signature Serum.
We introduced dip powder to the nail industry, and the liquids in the kit are the same system salons use, sized for one person. Our Nutri-Plus formulation adds vitamins A, E, D and B5, plus calcium, to the base coat and the powders. That's our claim about our own product, not an outside finding, and it's why we tell people to finish a dip powder manicure with the serum rather than skip it.

2. What Do You Need Before You Apply Dip Powder?
The right setup makes the process smoother and reduces mistakes. Give yourself a 45-minute window without interruptions, and get every bottle uncapped before the first coat of base goes on, because base coat doesn't wait while you look for a brush.
|
Setup item
|
Why it matters
|
|---|---|
| Clean flat surface | Powder spills happen. A wipeable surface is essential |
| Good lighting | Poor lighting hides bumps you can still fix at step 6 and cannot fix at step 8 |
| All 5 SNS DIY liquids uncapped | Dip Base Coat (purple cap), Dip Activator (gray cap), Dip Top Coat (red cap), Brush Cleaner, Signature Serum (yellow cap) |
| Foundation powder and your color, jars open | Foundation is the clear first layers that give the set its strength. The color goes on top. Keep both jars stable and close |
| Small paper towel or lint-free wipe | Brush off excess after each dip layer, and wipe the activator brush before it goes back in the bottle |
| Basic tools |
File, buffer, cuticle pusher, dust brush. A cotton pad with alcohol or acetone for the final wipe |
Both DIY kits box all of the above, plus a French dip mold, on the starter kits page. If you already own the liquids, the bottles are sold on their own in dip essentials and the colors are on dip-only powder.

3. How to Apply Dip Powder: The 8-Step SNS Protocol
Follow the steps in order, one hand at a time. The times are for a first-time user, and the waits in steps 5 and 7 are not optional. Total set time: about 45 minutes.
|
Step
|
What to do
|
SNS product
|
|---|---|---|
| 1. Prep (5-7 min) | File to shape, push cuticles back gently, buff the plate lightly, wipe clean with alcohol or acetone | Basic tools + lint-free wipe |
| 2. Base + Foundation (4 min) | Thin base on three quarters of the nail, dip into Foundation at a 45-degree angle, tap off the excess. Brush, then a second thin base up to the cuticle line and dip into Foundation again | SNS Dip Base Coat + Foundation powder |
| 3. Base + color (4 min) | Thin base up to the cuticle line, dip into your color at 45 degrees. Brush off, then repeat for the second color layer. Third pass for dark shades and glitter | SNS Dip Base Coat + Dip-Only Powder |
| 4. Brush off (1 min) | Sweep every trace of loose powder off before the activator | Small dust brush |
| 5. Activator, first coat (5 min) | Cover the whole nail. Wipe the brush on a lint-free towel before it goes back in the bottle. Wait 4 minutes, then tap the nail: a click means it's dry | SNS Dip Activator |
| 6. File + shape (5-8 min) | File and buff out bumps and ridges, dust off, then rinse and dry your hands with water only. No soap | 180-grit file + buffer |
| 7. Activator, second coat (3 min) | A second thin coat over the whole nail. Wait 3 minutes | SNS Dip Activator |
| 8. Top Coat + Serum (8 min) | Thin Top Coat sealing the free edge, wait 3 minutes, second coat, let it dry. Then Signature Serum around the cuticle | SNS Dip Top Coat + Signature Serum |
Step 1 in detail: clean, file, buff
Prep is the part people rush and then wonder why the set lifted at day four. It's four small jobs.
- Remove whatever is on the nail first. Gel or an old dip set comes off with a soak, not a pry. Our guide on removing dip powder at home covers it.
- Clean and push back. Wash your hands, then push the cuticles back gently with a cuticle pusher. Never cut them: cutting puts you at risk of infection and they grow back jagged and hard. Clear any debris from under the free edge.
- Shape. Clip excess length, then file from the outside corner toward the center and repeat from the other side. No back-and-forth sawing, which weakens the nail and invites splitting. If you're not sure which shape suits you, see what your nail shape says about you.
- Buff and wipe. Buff each nail to a smooth, even surface to take off ridges and shine, then wipe every nail with a cotton pad and alcohol or acetone. Oil left on the plate is the most common reason a set lifts early.
Steps 5 to 8 in detail: the waits that matter
- Apply Dip Activator over the whole nail. Before the brush goes back into the bottle, wipe it on a lint-free towel, or color ends up in the activator and stays there.
- Wait four minutes for the activator to dry completely. Tap the nail with the handle of the dust brush: a clicking sound means it's dry.
- File and buff each nail to take out any bumps or ridges, then brush the dust off.
- Rinse and dry your hands with water only. No soap at this stage.
- Second coat of Dip Activator, and wait three minutes.
- Thin layer of Top Coat over the whole nail, sealing the free edge. Wait three minutes.
- Second layer of Top Coat, and let it dry completely.
- Work Signature Serum into the cuticle line of each nail and follow with a hand cream.
"Almost every first set that comes back to me lifted in week one has the same story: Step 1 got rushed. Cuticle left on the plate, or shine left on it, and the base has nothing clean to grab, so it looks like the powder failed when it didn't. Give the prep its full five to seven minutes and the second set lasts noticeably longer than the first. And don't treat the serum as optional. It's the smallest bottle in the kit and it does the most for how the set looks at week two."
Anna Nguyen, Licensed Nail Tech (5+ yrs, San Jose CA), contributor at SNS Nails4. What Is the SNS Fast Dry Alternative to Apply Dip Powder?
Once you have a few sets under your belt, the SNS Pro Fast Dry Gelous Base takes the activator out of the sequence. The bottle is labeled no activator required: the base and the powder set on their own, so steps 5 and 7, and their four-minute and three-minute waits, disappear.
|
Standard protocol
|
Fast Dry alternative
|
Change
|
|---|---|---|
| Steps 2-3: SNS Dip Base Coat | Steps 2-3: SNS Pro Fast Dry Gelous Base | Swap the base coat |
| Step 4: Brush off | Step 4: Brush off | No change |
| Steps 5 and 7: SNS Dip Activator, two coats | Skipped | Saves the 4-minute and 3-minute waits |
| Step 6: File + shape | Same, straight after the brush-off | No change |
| Step 8: Top Coat + Serum | Same | No change |
Our Pro line, the Green and Yellow Green books, is the powder version of the same idea: a no-activator dip powder in salon sizes. It's the next step rather than the first one, and it lives under SNS Pro No Activator.

5. How Do You Get Thin Coats, Timing, and Layer Count Right?
Three technique details make the difference between an okay dip powder set and a beautiful one when you apply dip powder at home:
- Thin coats every time. Both Base Coat and Top Coat should be thin single-swipe layers. A thick base is what makes a home set look lumpy, and a thick top coat is what makes it dry dull.
- Respect the two activator waits. Four minutes after the first coat, three after the second, and the tap test tells you it's dry rather than the clock guessing for you. Cut the waits and the top coat goes on over powder that hasn't finished setting, which dries soft or dull.
- Two layers of Foundation, then two of color. That's the standard set. A very dark shade or a glitter may want a third pass of color, done the same way. The first base layer stops at three quarters of the nail; every layer after that goes up to the cuticle line and not over it, because powder on the skin is what you'll be filing off later.

6. 6 Common Mistakes When You Apply Dip Powder for the First Time
These are the issues we see most from first-time SNS dip powder users, at the salon and in the questions that reach us:
- Mistake 1: Rushing the cuticle prep in Step 1. Dip powder can't bond over cuticle residue or oil. Most week-one lift traces back here, and it looks like the powder failed when it didn't.
- Mistake 2: Applying Base Coat too thick. Use a single thin swipe. If you see the brush drag heavily, you have too much product.
- Mistake 3: Skipping the second color layer on dark shades. Dark shades and glitters need the extra pass for full opacity.
- Mistake 4: Not brushing off excess powder before Activator. Loose powder trapped under the activator turns into a rough, uneven surface.
- Mistake 5: Rinsing with soap between activator coats. Water only at that step. And wipe the activator brush before it goes back in the bottle, because once color is in the activator it stays there.
- Mistake 6: Skipping SNS Signature Serum in Step 8. Oil at the nail fold does more for how a set looks at week two than anything else, and it's the cheapest thing in the kit.

7. What Is SNS SenShine, and When Do You Move Up to It?
SenShine is our Pro dip essentials line: the same liquids under salon names, in salon sizes. If you've done a few kits and want to buy the bottles the way a salon does, this is where you go next. The steps on this page don't change; the labels do.
|
SenShine bottle
|
Kit equivalent
|
What it does
|
|---|---|---|
| EA Bond | Nail prep pad | Preps the nail plate for better bonding |
| Gelous Base | Dip Base Coat | Color dipping glue, the layer the powder grabs |
| Gel Base | Dip Base Coat, French sets | French dipping glue for pink and white |
| Sealer Dry | Dip Activator | Dries the powder and activates the base |
| Gel Top | Dip Top Coat | Two layers for the shine |
| UV Protection Top | No kit equivalent | Optional extra top layer in the line |
| Vitamin Oil | Signature Serum | Vitamin oil for the cuticle line |
The line also has a Brush Saver, which softens a base brush the activator has started to harden. That's the salon answer to the same problem the lint-free towel solves in the kit. Whichever set you use, work near an open window. The odor is low, but airflow makes an hour at the table nicer.
8. How to Apply Dip Powder FAQ
How long does it take to do dip nails at home?
About 45 minutes for a first set with the SNS DIY kit, most of it waiting on the activator and the top coat. It gets closer to 30 minutes once the sequence is familiar, but the waits don't shrink.
What is the correct dip powder application order?
Prep. Base and Foundation, twice. Base and color, twice. Brush off. Activator, four minutes, file and buff, rinse with water. Activator again, three minutes. Top Coat, twice. Signature Serum.
How many dip layers do I need?
Four in a standard set: two into Foundation, two into color. A third color pass only if the shade is dark or a glitter.
Do I need a UV lamp to apply SNS dip powder?
No. SNS dip powder sets chemically through the base coat and the activator. Nothing in the process goes under a lamp.
Can you do SNS nails at home?
Yes. The DIY kits are the salon system in 0.5 oz powders and 0.34 oz liquids, with the full directions in the box. The sequence on this page is the same one, written out with the timings.
What is the SNS Fast Dry alternative?
SNS Pro Fast Dry Gelous Base is a base coat labeled no activator required. Swap it in and the two activator coats and their waits come out of the sequence. The Pro No Activator books do the same on the powder side.
How thick should each coat be?
Thin, single-swipe, every time: base, activator and top. Thick coats bubble, dry dull and lift early.
Why is SNS Signature Serum applied last?
It's cuticle oil, not part of the set, so it goes on after the top coat has dried. Our serum carries vitamins A, D3, B5 and E plus calcium, and oil at the nail fold is what keeps a set looking new at week two.
How long does a set last, and how does it come off?
Most people get a few weeks, though prep and what you do with your hands move that number a lot. When it's time, soak it off and don't pick; the method is in our removal guide. Still deciding between systems? We compared them in gel or dip powder, and is dip powder bad for your nails answers the question underneath that one.
Editorial note: This guide follows the directions packed in the SNS DIY kits, with the activator and top coat timings as printed. The Nutri-Plus ingredient wording (vitamins A, E, D and B5, plus calcium) is taken from our own product pages and is our claim about our own product. No lamp is needed: SNS dip powder sets through the base coat and the activator.


