

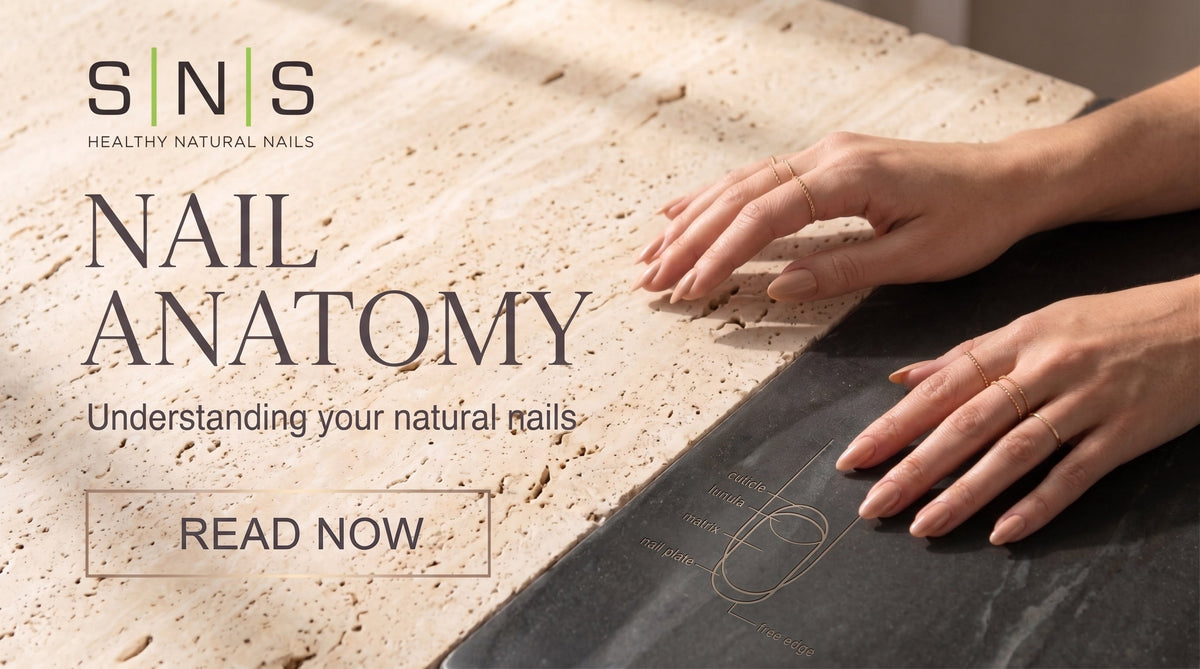
Nail anatomy for SNS dip users covers 8 parts you need to see before you apply: nail plate, free edge, matrix, lunula, eponychium, cuticle, hyponychium, and the three skin folds. Getting these names right lets you spot exactly where your SNS dip lifted and fix the one prep step you skipped next time. It is the difference between 21-day SNS wear and peeling at week one.
This SNS DIY nail anatomy guide was reviewed by Michelle Tran, SNS partner salon owner in Houston (7+ years running SNS dip service), against her salon's client-outcome data. Her verdict: "DIY clients who learn these 8 parts before their first SNS dip set apply cleaner and lift less. This is the vocabulary I wish every at-home user knew before their base coat goes on."
I coach 150+ SNS DIY at-home clients out of San Jose, and 8 out of 10 "my SNS dip lifted" messages I get trace back to one thing: the client cannot say WHERE it lifted. Base? Corner? Under the free edge? Each location points to a different prep step you missed. Without the vocabulary, every troubleshoot collapses into a guess.
This guide is the working vocabulary for SNS DIY: eight parts of the natural nail, three skin folds, one useful distinction (eponychium vs cuticle) that fixes half of all base-lifting complaints, and a location-to-cause diagnosis table you can pull up next time your dip set lifts.
Why naming the parts of your nail actually matters for SNS dip
The point of learning nail anatomy is not to sound like a pro. It is to build a location map. Once you have a map, you can point at the exact spot your dip failed and trace it to the prep step you skipped.
"It lifted at the cuticle" can mean three separate problems: dip peeling near the living skin at the base, dip losing seal because it touched the skin, or dip lifting in the corners where the side walls were prepped less carefully. Three locations, three causes, three different fixes. The right word is a diagnostic tool.
The 8 parts of your natural nail anatomy (SNS DIY dictionary)
The table below is your working vocabulary. Focus on the last column. Every part comes with one thing to remember when you are about to apply SNS dip powder. Reference from the American Academy of Dermatology confirms the anatomical structure.
| Part | Where it sits | What it does | SNS DIY rule to remember |
|---|---|---|---|
| Nail plate | The hard visible surface on top of your finger | The keratin layer SNS dip bonds to | About 0.3 mm thick. Do not file to raw plate on removal. Leave a thin veneer. |
| Free edge | The white tip that grows past your finger pad | The part you shape and cap with SNS Top Coat | 50% rule: if the free edge is longer than half the plate, it breaks at the stress point. |
| Matrix | Hidden under skin at the base, out of sight | The tissue that grows your nail | Never dig here. Any injury shows in new growth 3 months later. |
| Lunula | The pale half-moon at the base, visible on some fingers | The visible portion of the matrix | If you see the lunula clearly, the matrix sits shallow. Be extra gentle with pushers and files. |
| Eponychium | The living skin ring at the base of the nail | The active tissue that sheds cuticle onto the plate | Push back gently. Never cut. This is the seal that keeps water out. |
| Cuticle | The dead film sitting on the plate near the base | Dead tissue shed by the eponychium | This is what you REMOVE from the plate. Skipping this = SNS lifting at the base. |
| Hyponychium | Under the free edge, between finger pad and nail underside | Seals the underside, has a blood supply | Never cut. If skin grows out on your long SNS set, that is normal. |
| Sinuses | The two curves at the base of the plate, on either side | Anatomical landmark for finding your nail's center line | Draw a line up from between them. That is your apex line for SNS dip peak. |

Eponychium vs cuticle: the anatomy distinction that fixes SNS lifting at the base
Most people call two different things by the same word: cuticle. Getting this distinction right fixes half of all "my SNS dip lifted at the base" complaints.
The clean version of the rule: the eponychium is the LIVING skin around the base of your nail. The cuticle is the DEAD tissue the eponychium sheds onto the plate. In a proper SNS prep, pushing back the eponychium and removing the cuticle from the plate are two separate steps. Most "I prepped thoroughly but it still lifted" complaints I see are DIY users who did step one and skipped step two.

Push eponychium back gently with an orange stick. Then scrape the cuticle film OFF the plate with the same stick, working from cuticle toward free edge. The plate should look matte and dry, no shiny film. That is when SNS Base Coat bonds properly.
Nail anatomy rule: the lunula is a window to your matrix
The lunula is the pale half-moon at the base of your nail. It is the visible tip of the matrix, the tissue that grows your nail. This gives you a nail anatomy rule you can use every SNS cycle without any measuring.
If you can see your lunula clearly, the matrix sits shallow underneath. Handle that zone more carefully than the rest of the plate: soft pressure on pushers, gentle strokes on the file, never scrape aggressively at the base. If your lunula is barely visible or hidden by skin, the matrix sits deeper and the same zone tolerates more prep pressure. Same rule at removal: gentle push, gentle buff, no digging.

The hyponychium can grow after your first SNS long set (why this is normal nail anatomy)
Under your free edge, tucked between your finger pad and the underside of the nail, is a small strip of living tissue called the hyponychium. It seals the underside and keeps water and bacteria out. It has a blood supply. Never cut it.
Two things worth knowing for SNS DIY. First, the hyponychium can grow further outward once you start wearing longer SNS dip sets. Your body reads the longer free edge as needing more underside support and extends the skin to meet it. This is normal, not a problem. Second, this is why some SNS DIY users on their first long set worry about seeing skin under the free edge that was not there before. That is the hyponychium doing its job.

Nail anatomy: the three skin folds that seal your SNS dip prep
Three connected skin folds surround your nail and share the same job of sealing the nail unit. Recognising them by name lets you spot damage and irritation early, before it escalates.
| Fold | Location | SNS DIY watch-out |
|---|---|---|
| Proximal fold | At the base of the nail (where eponychium sits) | Push back gently. Do NOT let SNS Base Coat touch this fold. That is what causes base lifting. |
| Lateral folds (2) | Along the sides of the nail (side walls) | Prep here as carefully as the center. Corner lifting starts because lateral fold seal was rushed. |
| Distal fold | Along the free edge, most visible on nail biters | If prominent, you have less free edge. File conservatively before your SNS dip. |

Where the SNS dip powder should be thicker: apex and product zones anatomy
The natural nail has anatomical parts. A built SNS dip nail also has product zones, and each zone carries a specific amount of dip powder. Getting the amounts wrong is what makes an SNS set look bulky, feel heavy, or lift structurally.
The single most common SNS DIY mistake is loading the wrong zone. New users often carry too much SNS dip powder near the cuticle and body of the nail, and not enough at the apex (highest point of arch) and stress area (just before the free edge). The set looks bulky AND still lifts, because the structural load is in the wrong place.
| Zone | Where it sits | SNS DIY rule |
|---|---|---|
| Zone 1: Cuticle area | First 1-2 mm from the base | Thin layer. Leave a hair-line gap from the eponychium (never touch it). |
| Zone 2: Nail body | Middle third of the plate | Even, thin dip layer. Do NOT build height here. |
| Zone 3: Apex (peak) | One-third to two-thirds from cuticle toward free edge | THIS is where the SNS dip powder builds up. The apex carries the load. |
| Zone 4: Stress area | Just before the free edge, over the finger pad edge | Second-thickest zone. Reinforces where the plate bends most under pressure. |
| Zone 5: Free edge / hairline | The tip capped by SNS Top Coat | Thin cap on top + underside. This is the wear seal, thin but complete. |
Way 1 by ratio: the apex sits between one-third and two-thirds of the way from cuticle to free edge. Two-thirds gives a longer, more dramatic arch. One-third gives a shorter, softer arch. Way 2 by landmarks: draw a line straight up from between your two sinuses (curves at the base of the plate on either side). That line marks where your apex should sit. Either method works at the vanity.

Read your SNS dip lifting by anatomy location (diagnosis table)
This is where the vocabulary becomes a working tool. When your SNS dip set lifts, look at WHERE it lifted first, then trace back to the prep step that caused it. The left column uses the anatomy words from the sections above.
| Where it lifted | Most likely cause | SNS DIY fix next cycle |
|---|---|---|
| At the eponychium (base, near living skin) | SNS Base Coat touched skin, or eponychium was not pushed back enough | Push eponychium back cleanly. Keep a hair-line gap. Base Coat NEVER touches skin. |
| On the plate near the cuticle | Cuticle film was not removed from the plate before Base Coat | After pushing eponychium, scrape cuticle film off the plate. Plate should look matte and dry. |
| In the corners (lateral folds) | Side walls were prepped less carefully than the center | Prep side walls with the same attention as center. Extend Base Coat to the exact edge, no further. |
| At the free edge (tip) | Free-edge cap was skipped or too thin on Top Coat step | Cap the free edge with Top Coat on top AND underside. That is the wear seal. |
| Under the free edge (hyponychium side) | Top Coat did not seal the underside of the free edge | Underside cap = same technique as top cap. Skip = water gets in, lifts within days. |
| Cracked in the middle (across the C-curve) | Apex was flat or placed too far back, not enough dip powder at the peak | Build a proper apex between 1/3 and 2/3 from cuticle to free edge. |

What this SNS nail anatomy article will not tell you
Three things to be honest about, so nobody misreads what nail anatomy vocabulary can and cannot do for a DIY SNS user.
1. It is not a procedure guide. How to build an SNS dip apex, how to layer the powder, how much Activator to use. Vocabulary is diagnosis. Application technique lives in our separate SNS DIY apply guide.
2. It is not medical guidance. Recognising that the nail plate has separated from the nail bed is a DIY user's spotting skill. Diagnosing fungus, distinguishing conditions of the nail unit, or interpreting discoloration is your dermatologist's job. When a nail has odor, discharge, or unusual discoloration, stop your SNS routine and see a professional.
3. It is not a chemistry deep dive. Two common ingredients in some gel systems, HEMA and TPO, have documented irritation profiles. The EU restricted both from September 2025 in nail cosmetics. SNS Nutri-Plus dip powder is a different chemistry. If you have ever reacted to any nail product, patch-test a small area before doing a full SNS set.
How SNS Nutri-Plus vitamins deliver into these nail anatomy parts
Knowing the anatomy makes SNS product placement clearer. The SNS Nutri-Plus vitamin panel (A, E, B5, D3 plus calcium and zinc) is designed to deliver into the nail plate through the dip powder layer over your 21-day wear cycle. Between sets, SNS Signature Serum carries the same 6-vitamin panel through the eponychium and lateral folds into the plate directly.
That is why the SNS between-sets routine is Signature Serum every 2-3 days plus SNS Vitamin Oil daily on the cuticle. Signature Serum delivers the vitamins. Vitamin Oil keeps the eponychium and folds soft enough to absorb them. Together they preserve the 21-day wear performance you get from the next SNS Dip-Only Powder set.
Head to the SNS DIY apply guide next. Then browse the 1,000+ SNS Dip-Only Powder library for your first set. Between sets: SNS Vitamin Oil daily + SNS Signature Serum every 2-3 days keeps the Nutri-Plus vitamin delivery continuous.
FAQ: nail anatomy questions from SNS DIY users
How thick is my natural nail plate and why does it matter for SNS dip?
About 0.3 mm thick. It matters on removal day. Do not file down to bare plate. That removes keratin layers with the SNS dip. Leave a thin veneer of product, then apply SNS Signature Serum immediately to restore Nutri-Plus vitamins.
What is the difference between eponychium and cuticle when I prep for SNS dip?
Eponychium is the LIVING skin around the base of your nail. Cuticle is the DEAD tissue the eponychium sheds onto the plate. Push the eponychium back gently. Remove the cuticle film from the plate completely. Skipping the second step is the number one cause of SNS dip lifting at the base.
Where should the apex sit on my SNS dip set?
Between one-third and two-thirds of the way from your cuticle to your free edge, and directly above the space between your two sinuses at the base of the plate. Either landmark works when placing SNS dip powder.
What is the lunula and does it change how I prep or remove SNS dip?
The lunula is the pale half-moon at the base of your nail. It is the visible portion of the matrix. If your lunula is clearly visible, the matrix sits shallow. Handle that zone gently with pushers and files, both during prep and during SNS dip removal.
I see skin growing under my free edge on my longer SNS dip set. Is that normal?
Yes. The hyponychium (living skin under the free edge) can extend outward when you wear longer SNS dip sets. Your body reads the longer free edge as needing more underside support. It is normal, not a problem. Never cut it, it has a blood supply.
My SNS dip lifted at the base of my nail. What went wrong?
Almost always one of two things. Either the eponychium was not pushed back enough and Base Coat touched living skin (base seal fails at day 3-5), or the cuticle film on the plate was not fully removed (Base Coat bonds to dead tissue, not plate). Both are prep-step issues, not SNS product issues.
What does the 50% free edge rule mean for my SNS dip?
If you start with a free edge longer than half your nail bed length, the leverage ratio at the stress area exceeds what the plate can hold, and your SNS dip cracks at the stress zone within days. Trim shorter before your next SNS Dip-Only Powder application.
Sources and further reading on nail anatomy
- American Academy of Dermatology: Nail anatomy and nail-care basics. aad.org/public/everyday-care/nail-care
- NIH PubMed: Nail plate thickness measurement studies (reference values 0.2 to 0.6 mm, mean 0.3 mm). ncbi.nlm.nih.gov/pubmed
Continue your SNS DIY learning journey


